Merken
 My coworker Sarah showed up to the office on St. Patrick's Day with a tin of these brownie bites, and I watched them disappear faster than any dessert I've ever seen. The moment I bit into one, that cool mint flavor hit first, followed by the deep chocolate richness—it felt festive without being over the top. She confessed later that she'd made them at midnight the night before because she'd forgotten about the potluck, and somehow that rushed energy made them taste even better. There's something about a dessert that manages to be both decadent and refreshing that just works for spring celebrations.
I made these for my daughter's classroom party, and the teacher asked me for the recipe on the spot—her exact words were, "These taste like a fancy bakery made them." That moment of seeing something you made with your own hands actually impress people never gets old, especially when kids are reaching for seconds.
Ingredients
- All-purpose flour: Use 3/4 cup (95 g) for structure that keeps these tender rather than cake-like, and measure by spooning into a cup rather than scooping directly.
- Unsweetened cocoa powder: The 1/2 cup (45 g) is what gives you that authentic brownie depth, not just chocolate flavor.
- Baking powder: Just 1/2 teaspoon helps them rise slightly without making them fluffy, which would ruin the fudgy texture you're after.
- Salt: A quarter teaspoon might seem small, but it's your secret weapon for making the chocolate taste more chocolate-y.
- Unsalted butter: Melt 1/2 cup (115 g) and let it cool for a minute or two so it doesn't scramble the eggs when you mix them in.
- Granulated sugar: One cup (200 g) dissolves into the butter to create that glossy, fudgy interior you're chasing.
- Large eggs: Room temperature ones blend in more smoothly, which I learned the hard way when cold eggs created little streaks through my batter.
- Pure vanilla extract: Use 1/2 teaspoon to add warmth without competing with the mint.
- Peppermint extract: This 1/2 teaspoon is where the festive magic happens, but resist the urge to add more or it'll taste medicinal.
- Green food coloring: Two or three drops keep the color subtle and sophisticated rather than neon, and honestly, you can skip it if you prefer.
- Mini chocolate chips: Use 1/2 cup (90 g) plus extra for topping, and don't substitute with regular chips or they'll sink and disappear.
- Andes mints or mint chocolate pieces: Quarter cup (40 g) chopped up adds pockets of extra mintiness, though they're optional if you're a purist.
Tired of Takeout? 🥡
Get 10 meals you can make faster than delivery arrives. Seriously.
One email. No spam. Unsubscribe anytime.
Instructions
- Heat your oven and prep the pan:
- Set your oven to 350°F (175°C) and grease a mini muffin tin with a light touch of butter or cooking spray, or line each cup with tiny paper liners. Paper liners make cleanup effortless and help the brownie bites release without sticking.
- Combine your dry ingredients:
- In a medium bowl, whisk together the flour, cocoa powder, baking powder, and salt until there are no lumps and everything looks evenly distributed. This whisking step aerates the cocoa powder and prevents dense pockets in your final bites.
- Mix the wet base:
- In a large bowl, whisk the melted butter and sugar together until the mixture looks slightly paler and feels silky, which takes about a minute. Add the room-temperature eggs, vanilla extract, peppermint extract, and food coloring if using, then whisk until the mixture is smooth and homogeneous.
- Bring everything together:
- Gently fold the dry mixture into the wet mixture using a rubber spatula, stirring just until no flour streaks remain—overmixing develops gluten and makes brownies tough. The batter should be glossy and thick, like fudge ready to be spooned.
- Add the chocolate:
- Fold in the mini chocolate chips and chopped Andes mints if you're using them, distributing them evenly throughout so every bite gets its share of chocolate. Be gentle so you don't deflate all the air you whisked into the wet mixture.
- Fill the tin:
- Spoon batter into each mini muffin cup until it's about three-quarters full, leaving just a tiny gap for the brownie to rise slightly in the oven. If you fill them too much, batter will overflow and create weird edges; if you fill them too little, they'll be stingy.
- Add your finishing touch:
- Sprinkle a few extra mini chocolate chips on top of each mound of batter if you want them to bake into the brownie, or save this step for after they cool if you prefer extra texture on the surface. Either way, they'll look bakery-worthy.
- Bake until just set:
- Bake for 13 to 15 minutes, checking around the 13-minute mark by inserting a toothpick into the center of one bite. You want the toothpick to come out mostly clean with just a few moist crumbs clinging to it—this is the sweet spot between underbaked and overbaked.
- Cool and release:
- Let the brownie bites sit in the tin for 5 minutes so they set enough to handle without falling apart, then transfer them to a wire rack to cool completely. The residual heat from the tin will continue cooking them slightly, which is perfect.
 Merken
 The best part about making these came when my neighbor saw me carrying the tin next door and immediately asked if I'd made them or bought them from a bakery. That split second before I answered, I felt genuinely proud of something so simple yet so perfectly executed.
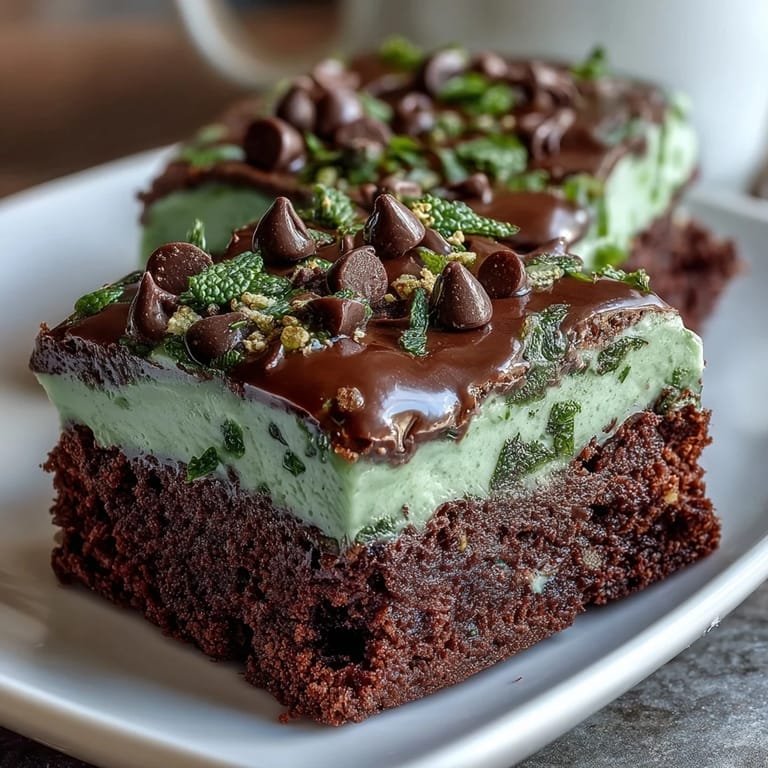
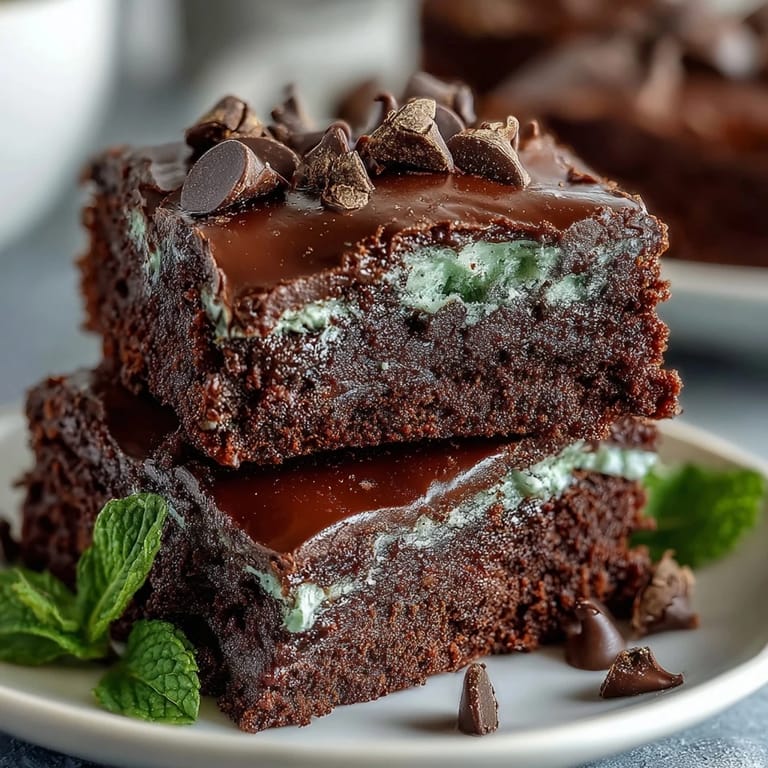
The Mint-Chocolate Balance
The magic of this recipe lives in not letting either flavor take over—the chocolate keeps the mint from tasting like toothpaste, and the mint keeps the chocolate from feeling heavy. I learned this by tasting different ratios, and once I hit that balance, I understood why these bites disappeared so quickly at every gathering. If you're nervous about the peppermint extract, start with a quarter teaspoon and taste the batter before the full amount goes in.
Storage and Make-Ahead Strategy
These actually taste better on day two because the flavors meld together, so make them the day before if you're serving them at a party and want to minimize stress. Keep them in an airtight container at room temperature for up to five days, and they'll stay fudgy and soft the entire time. I've also frozen them for up to two weeks—just thaw them on the counter for 20 minutes before serving.
Variations and Swaps You Can Confidently Make
Once you nail the basic recipe, you can get creative without losing the essence of what makes these special. White chocolate chips mixed with dark chocolate chips create a prettier speckle, or you can skip the Andes mints entirely if you want a straightforward mint brownie without extra candy pieces. The food coloring is purely optional—these are festive enough with the mint flavor alone.
- Swap Andes mints for crushed candy canes for a crunchier texture and more intense peppermint punch.
- Use dark chocolate chips instead of mini chocolate chips if that's what you have on hand, though they'll create bigger pockets of richness.
- Reduce the peppermint extract to a quarter teaspoon if you're making these for people who prefer subtle mint flavoring over bold.
 Merken
 These brownie bites capture all the festiveness of St. Patrick's Day without requiring any baking skill or elaborate technique. Make them whenever you need something that feels special but doesn't stress you out.
Rezept-Fragen & Antworten
- → Wie bekommt man die Brownie Bites besonders fudgy?
Nutze qualitativ hochwertige Butter und reduziere Mehl leicht. Das sorgt für eine feuchte, dichte Textur.
- → Kann ich die Minzaromen variieren?
Ja, entweder mehr Pfefferminzextrakt hinzugeben oder Andes-Minzstückchen für intensiveren Geschmack verwenden.
- → Lässt sich grüne Lebensmittelfarbe weglassen?
Natürlich, sie dient nur zur dekorativen Optik und beeinflusst den Geschmack nicht.
- → Wie bewahrt man die Brownies am besten auf?
In einem luftdichten Behälter bei Raumtemperatur bis zu fünf Tage frisch halten.
- → Kann ich normale Schokostückchen durch eine andere Sorte ersetzen?
Ja, dunkle, Milch- oder weiße Schokolade eignen sich gut – je nach persönlichem Geschmack.